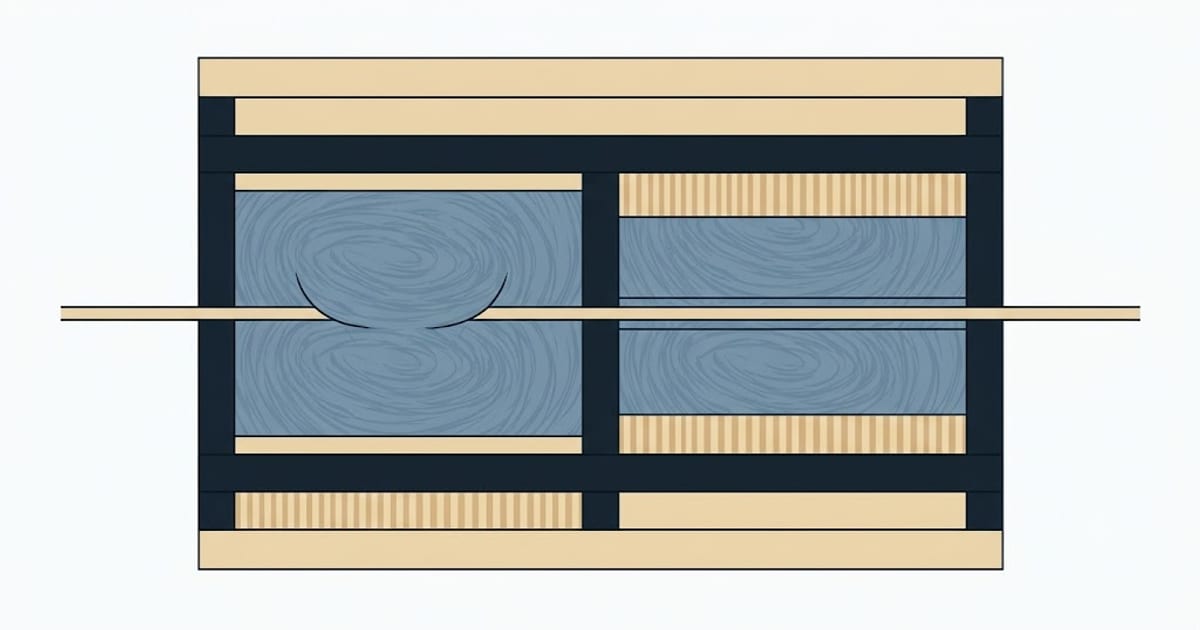
The trade grades batt installations I, II and III, and the difference between the best and the worst is worth more than a whole step of nominal R-value.
Grade I is a full, even fit: no gaps, no compression, no voids, the batt in contact with the sheathing behind and flush with the stud faces in front, split around every obstruction.
Grade II allows small defects — occasional gaps under about 2% of the area, minor compression.
Grade III has visible gaps, compression, or voids over more than 5% of the area.
A Grade III wall with R-15 batts performs somewhere near R-11. The batts are exactly what the label says; the wall is not.
Why a small gap costs so much
If insulation only conducted, a 5% gap would cost about 5%. It costs far more, because a gap is a path for air.
Air moving through or around a batt carries heat by convection, and convection moves heat far faster than conduction through fibre. A continuous vertical gap along one stud face lets air circulate up the warm side and down the cold side inside the cavity, effectively short-circuiting the insulation for the whole height of the bay.
That is why edge contact matters more than the middle. A batt with a slightly thin centre is a minor loss. A batt not touching the stud face along its full height is a large one.
The wiring detail
Cables and pipes crossing a bay cause more Grade III walls than anything else, and there is one right answer.
Split the batt. Peel it into a front and back layer, pass the cable between them, and let both layers sit flat. The cavity ends up fully filled with the obstruction inside the insulation rather than behind or in front of it.
Do not push the batt behind the cable. That compresses the material behind it and leaves an air pocket in front — the worst of both.
Do not cut a hole and leave a void around it. Electrical boxes want the batt cut to fit closely around the box and filled behind it, not left hollow.
The other five things that make a Grade I wall
Fill the full depth, no more. The batt should be flush with the stud faces. Bulging proud means the plasterboard will compress it; sitting low leaves an air gap on the warm side.
Contact the sheathing. No gap behind. The back of the batt should touch the exterior sheathing across the bay.
Corners and headers. Exterior corners and the space above a window header are routinely missed because they are awkward to reach and hidden once boarded.
Narrow bays cut, not folded. Measured width plus half an inch. Folding halves the effective thickness.
Faced batts stapled to the stud face, not the side. Face stapling holds the flange flat against the face and lets the board sit tight. Inset stapling into the sides of the studs pulls the flange in and creates a channel along both edges — a gap by construction.
Insulation does not stop air
The most common misunderstanding on site: fibrous batts are air permeable. They slow conduction; they do not stop airflow.
So a bay that is perfectly filled but open to a wall cavity, a floor void or an attic still loses heat by air movement through the batt. Air sealing is a separate job from insulating and it comes first — the case for doing it in that order is in air seal the attic first.
A five-minute inspection before boarding
Stand in the room, look across the wall at a low angle, and check: every bay full to the stud face, no visible gaps at edges or corners, batts split around every cable and pipe, nothing bulging, headers and corners filled, and the batt in contact with the sheathing where you can see behind it.
That inspection is the highest-return five minutes in the whole job, and it is the last moment anyone will ever see the inside of that wall.
Bag count and the R the finished cavity reaches are on the wall batt page. What that cavity number means for the whole wall is in R-value for exterior walls.